
- Please select the card you wish to join
-
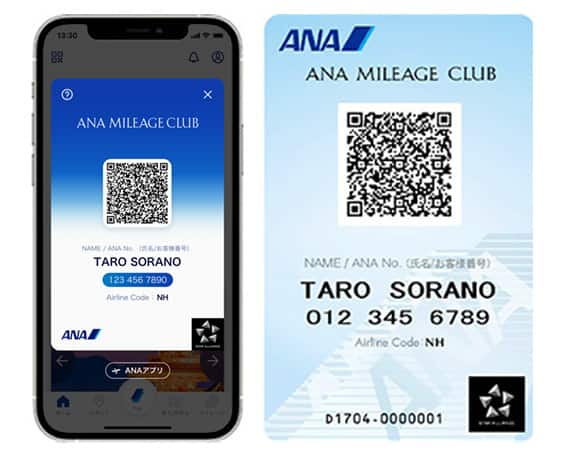
Get your digital card immediately
No enrollment or annual fees
ANA Mileage Club Card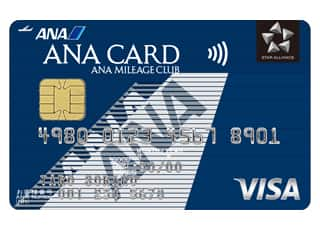
Earn more miles for your money
With credit function
ANA Card
Self-service Check-in Machines
Our self-service check-in machines make checking in at the airport easier and smoother.
ANA continues to strive to offer services that are easier for you to use.
For International Flights
Topics of this Service
-
You can select your seat using a seat map. (You can change your seat if you had already selected a seat in advance.)
-
You can register your mileage.
-
You can check-in to a upper cabin class when an upgraded seat is confirmed.
Applicable Routes
All ANA Group international flights departing from Narita, Haneda, Kansai, Qingdao, Guangzhou, Beijing, Shanghai (Pudong), Hong Kong, Dalian, Shenzhen, Seoul (Gimpo), Taipei (Taoyuan/Songshan), Seattle, Los Angeles, Honolulu, London, Brussels, Vienna, Paris, Frankfurt, Kuala Lumpur, Jakarta, Mumbai, Chennai, Perth, Singapore Airport
-
*
Service may not be available on certain codeshare flights which are operated by partner's aircraft and crew.
Open Time for and How to use Self Service Check-in machines
Airports in Japan
| Airport | Open Time for Self Service Check-in machines | How to Operate |
|---|---|---|
| Narita | 6:00 - check-in close time for the last departure flight of the day | Information about ANA Self Service Check-in Machines (Narita Airport) |
| Kansai | 6 hours prior to departure flight - closing of check-in counter | Information about ANA Self Service Check-in Machines (Kansai Airport) |
| Haneda Terminal 2 |
6:00 - check-in close time for the last departure flight of the day *Check-in open time may be changed depending on the flight schedules. |
Information about ANA Self Service Check-in Machines (Haneda Airport) |
| Haneda Terminal 3 |
6:15 - check-in close time for the last departure flight of the day *Check-in open time may be changed depending on the flight schedules. |
Information about ANA Self Service Check-in Machines (Haneda Airport) |
-
*
For information on how to check in when connecting from a Japan domestic to an international flight, please see Regarding the Use of Self-Service Check-in Machines when Connecting from a Japan Domestic Flight to an International Flight.
Airports outside Japan
Eligible customers
Customers who have an e-ticket.
However, please come to the ANA check-in counter if you are:
-
Customers whose reservation has been changed and not reissued
-
Customers requiring assistance in boarding
-
Using code-share flights with other airlines. (When using a code share flight, please check-in at the operating airline counter.)
-
*
The Self Service Check-in machine may not be available depending on the ticket and the type of passport. Please speak to a member of staff at the airport for more details.
For an International Flight Connected from a Japan Domestic Flight
Service Features
-
Check-in procedures can be completed for both your Japan domestic flight and international connecting flight.
-
Mileage can be registered.
Eligible Customers
-
Customers with a reservation for an international flight departing no later than 24 hours after the arrival of their Japan domestic flight.
-
*
Customers traveling between Narita and Haneda or Itami and Kansai for a connection can also use the self-service check-in machines at departure airports, but must check in their baggage once again at the connection airport. Please check the information about connecting from a Japan domestic flight to an international flight to see if the self-service check-in machines are available at the relevant airport.
Available Times
From the opening time of the relevant airport until the check-in closing time for the first Japan domestic segment.
How to Use
Scan the 2D barcode with your smartphone for information on how to use the self-service check-in machines.
-
*
Self Service Check-in machines will start being updated from the fall of 2025, the operation screen will partially change.Please follow the on-screen instructions.
-
STEP 1
Initial Screen
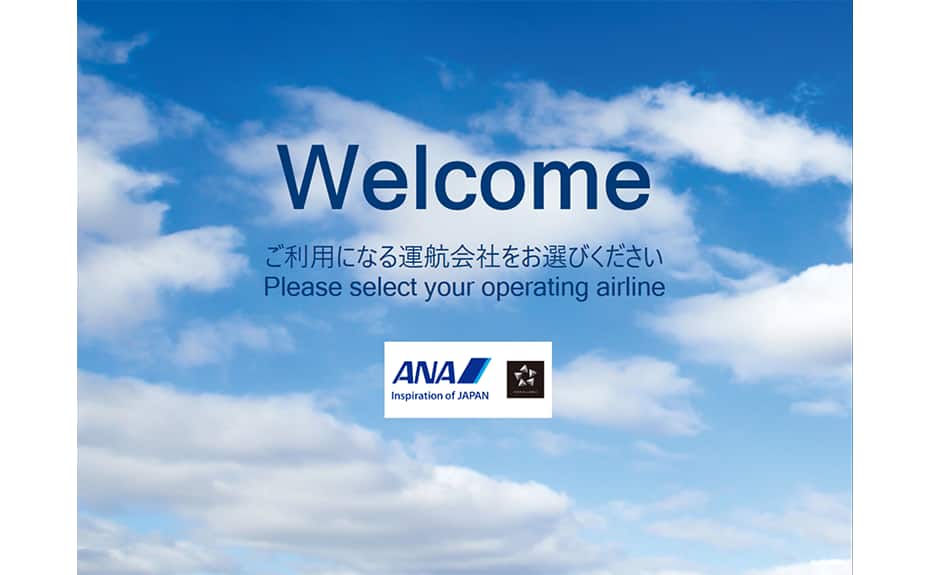
Please select your airline.
-
STEP 2
Dangerous Goods Screen
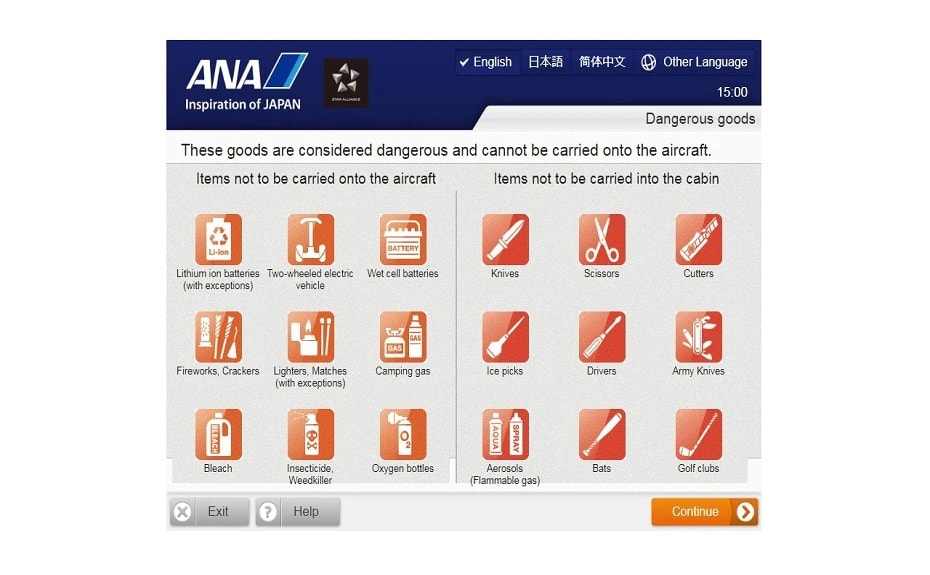
Please confirm the various cautions related to hazardous materials and dangerous goods.
-
*
The display language can be changed at any time by tapping the "Other Language" button in the upper right-hand corner of the screen.
-
*
-
STEP 3
Reservation Search Method Selection Screen
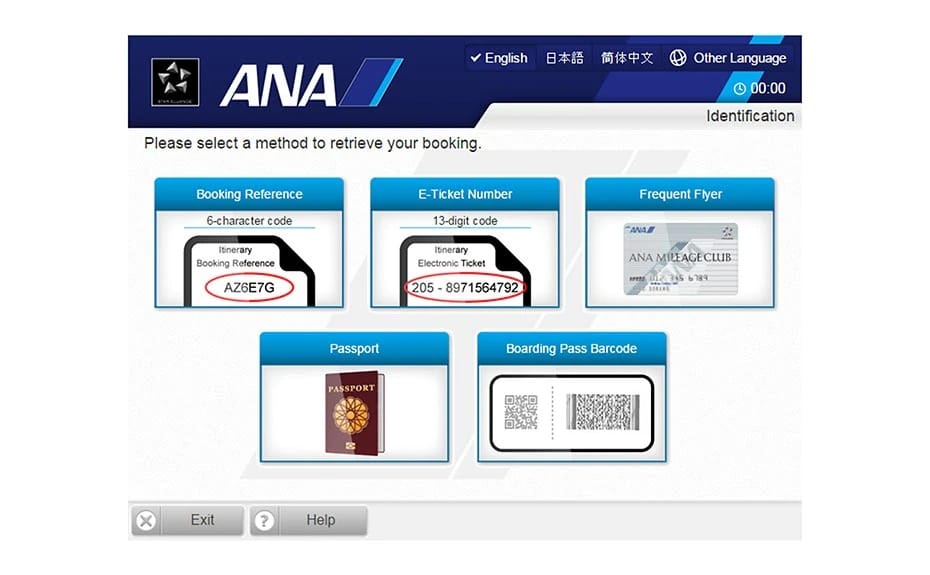
Select your preferred method to search for your reservation.
-
If you select "Search by Reservation Number", proceed to Step 4.
-
If you select "Search by e-Ticket Number", proceed to Step 5.
-
If you select "Search by Mileage Card Number", proceed to Step 6.*1
-
If you select "Search by Passport", proceed to Step 7.*1
-
If you select "Search by Boarding Pass Barcode", proceed to Step 8.
-
*
1
Only applicable if your boarding pass was registered to your reservation information in advance.
-
-
STEP 4
Search by Reservation Number Screen
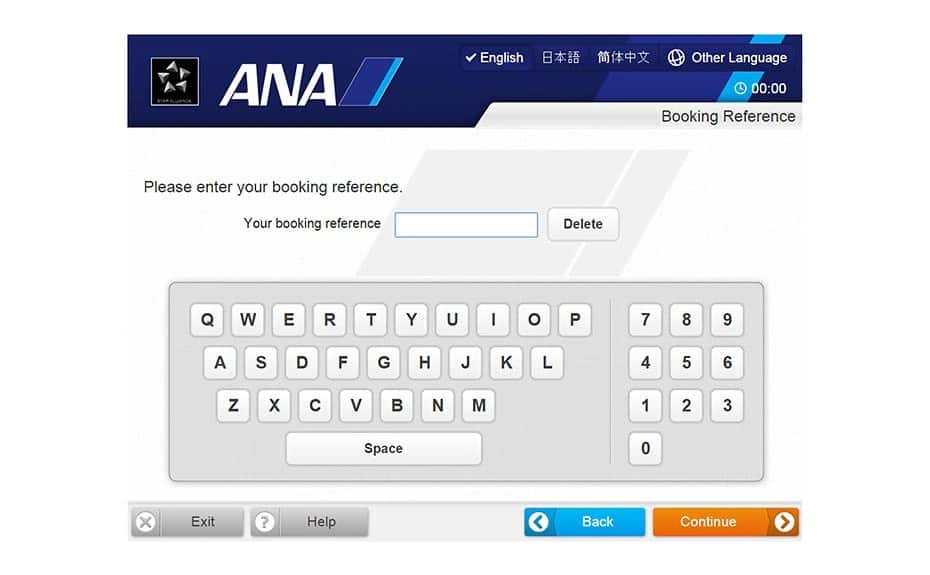
Enter the reservation number (6 alphanumeric characters) that is found on your itinerary receipt.
Proceed to Step 9. -
STEP 5
Search by e-Ticket Number Screen
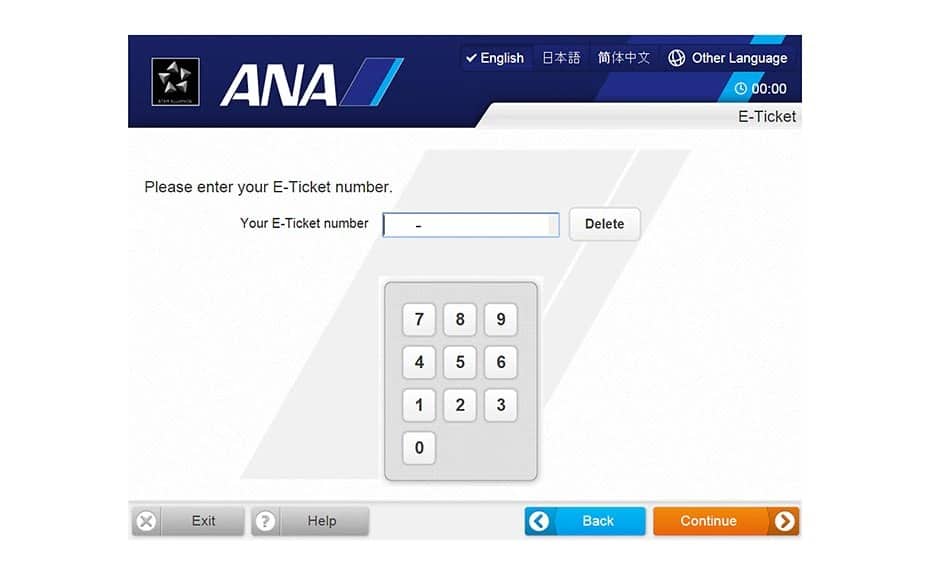
Enter the 13-digit e-Ticket number that is found on your itinerary receipt.
Proceed to Step 9. -
STEP 6
Mileage Card Reader Screen
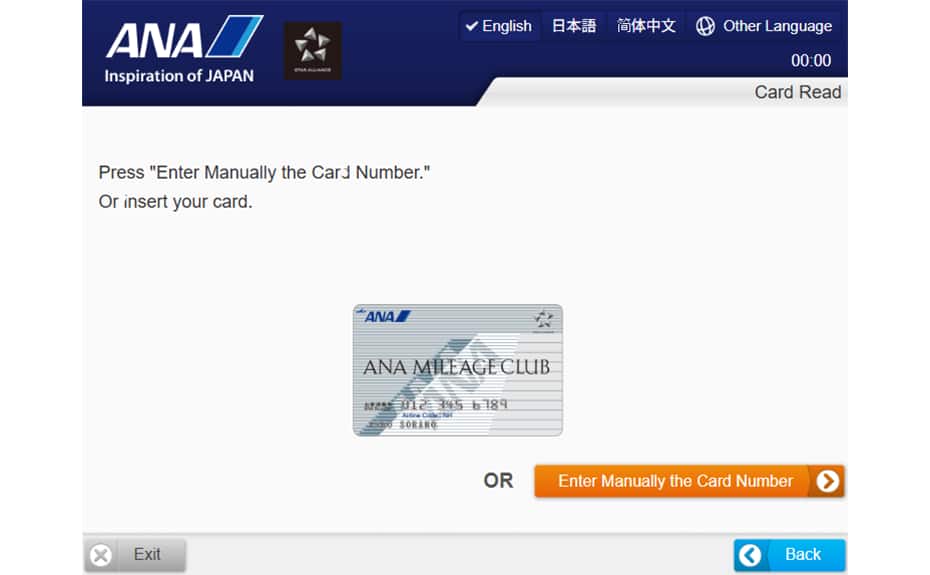
Please select "Enter Manually the Card Number" and input the number manually.
Proceed to Step 9. -
STEP 7
Passport Reader Screen
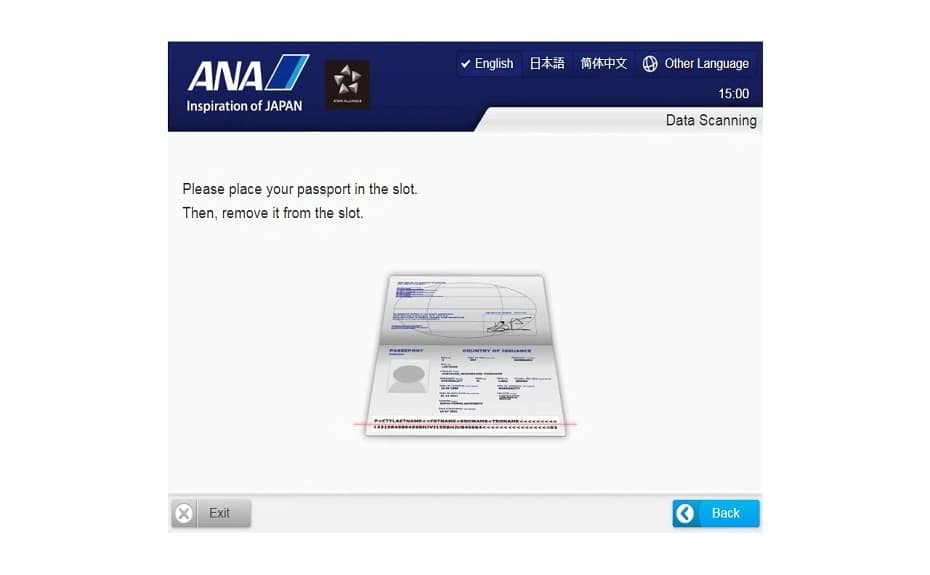
Place the passport that is registered to your reservation information onto the passport reader.
Proceed to Step 10. -
STEP 8
2D Barcode Reader Screen
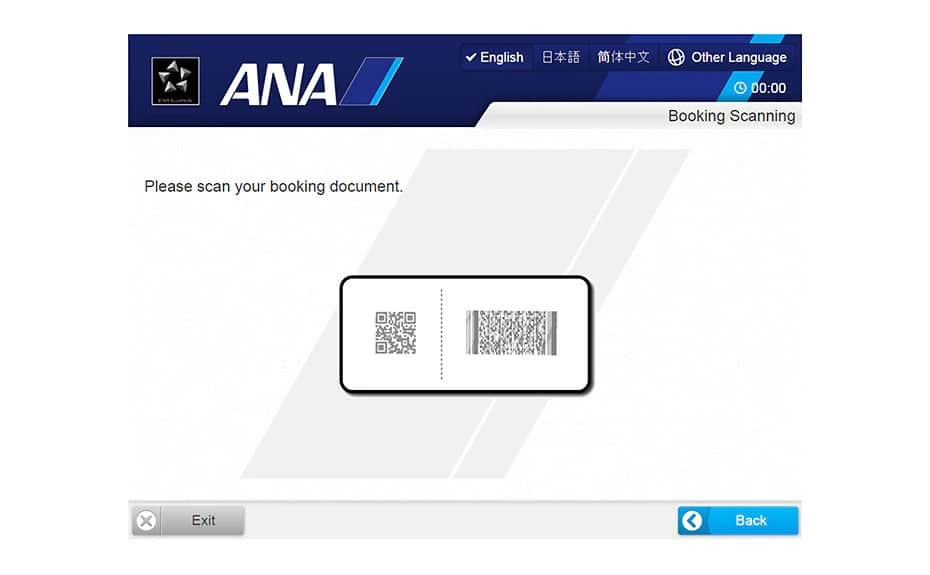
Place the 2D barcode (QR code) that is printed on the upper right corner of your itinerary receipt onto the barcode reader.
Proceed to Step 9. -
STEP 9
Passport Information Registration Screen
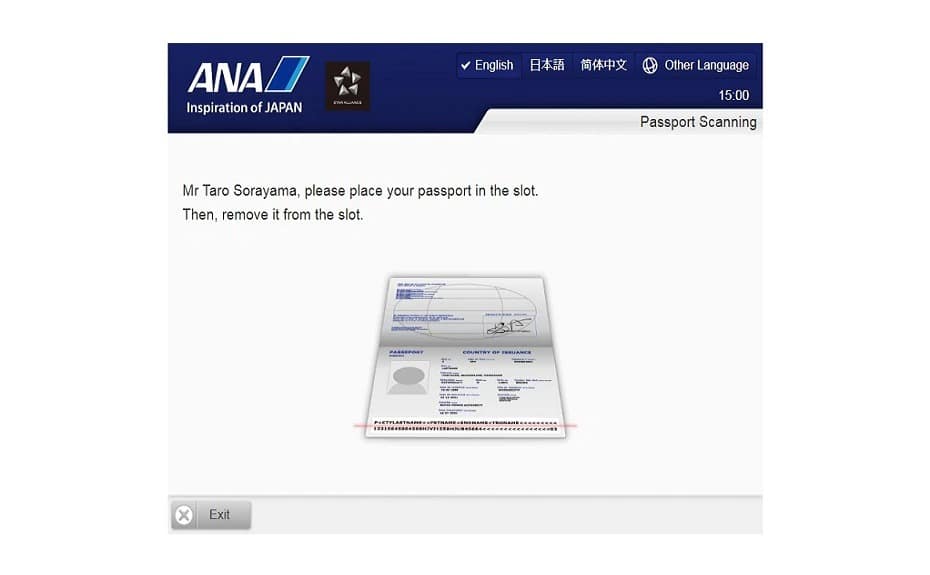
Place your passport onto the passport reader to register the relevant information.
-
STEP 10
Passport Information Confirmation Screen
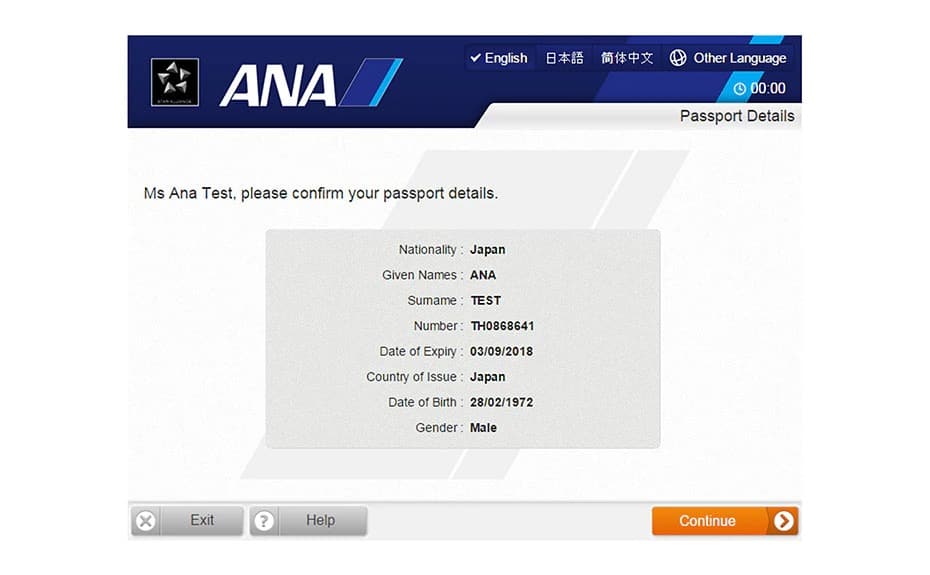
Confirm that the displayed passport information is correct.
-
STEP 11
Reservation Confirmation Screen
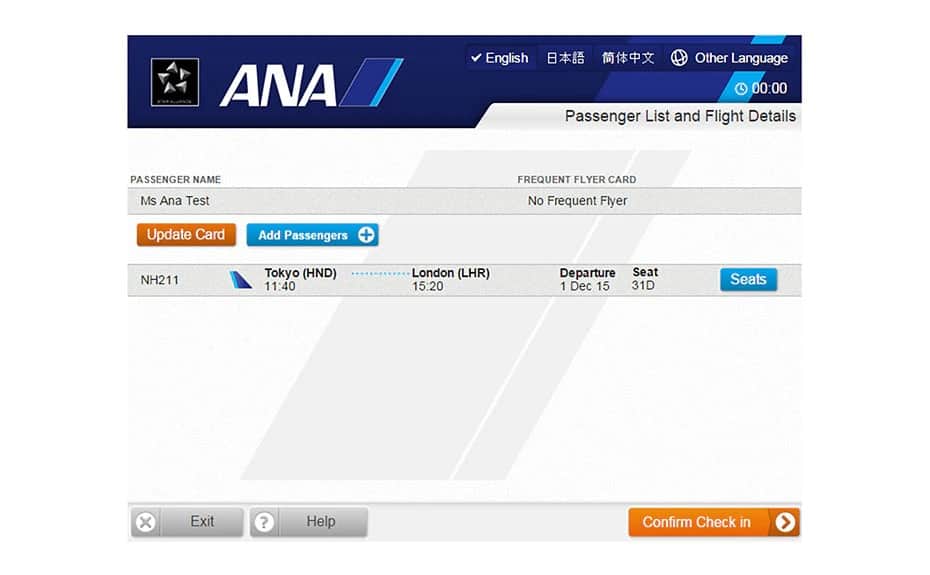
Check the reservation details displayed and tap the Confirm button.
After the boarding pass has been issued, proceed to Step 24. -
STEP 12
Seat Map Screen
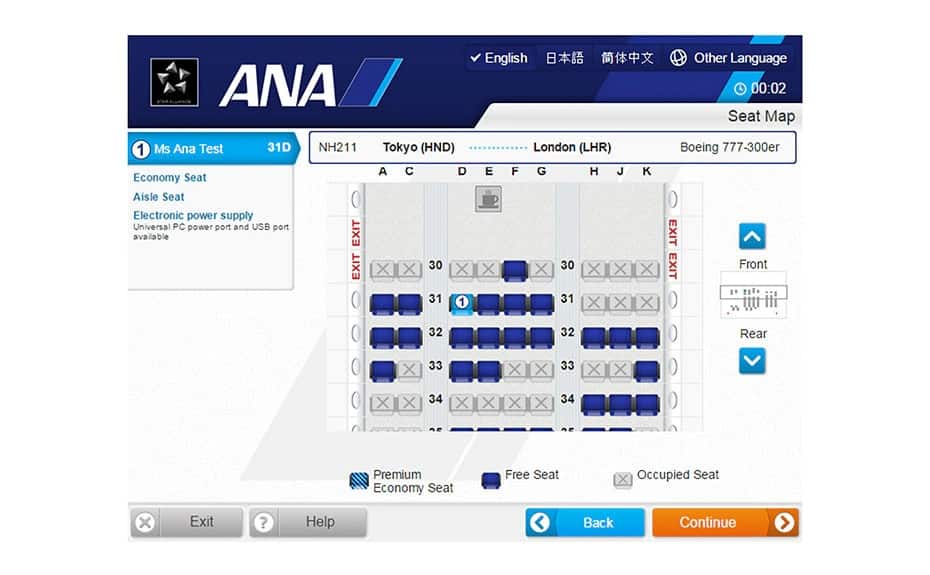
After selecting your desired seat, tap the Confirm button.
Proceed to Step 11 again to view the latest details for your reservation. -
STEP 13
-
STEP 14
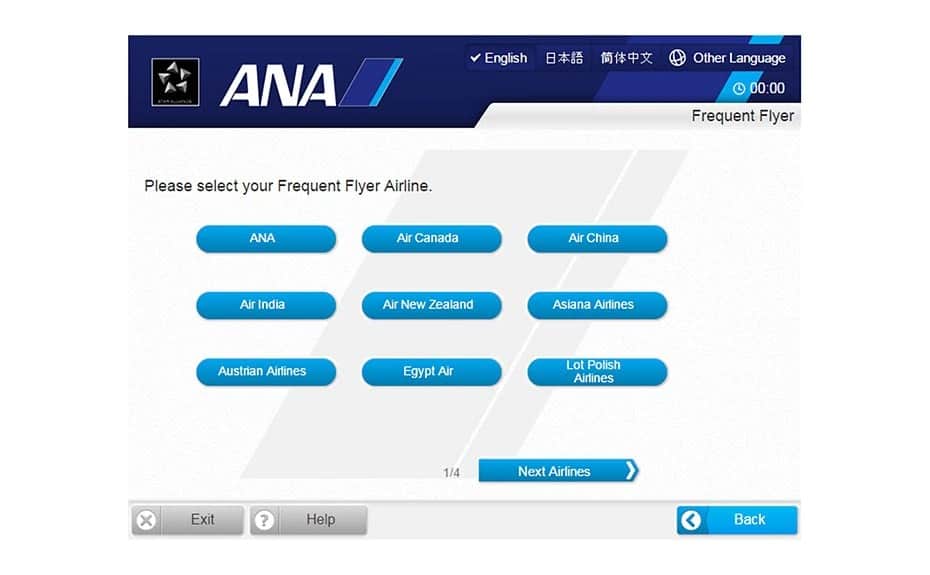
Enter Frequent Flyer Card Number Screen
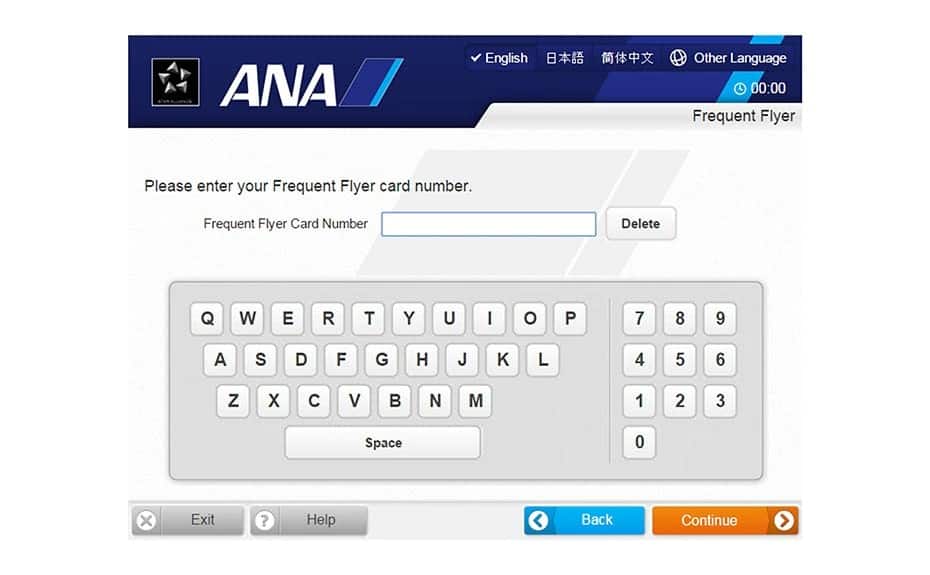
Enter the membership number that you wish to register.
After you have registered your number, proceed to Step 11 again to view the updated details for your reservation. -
STEP 15
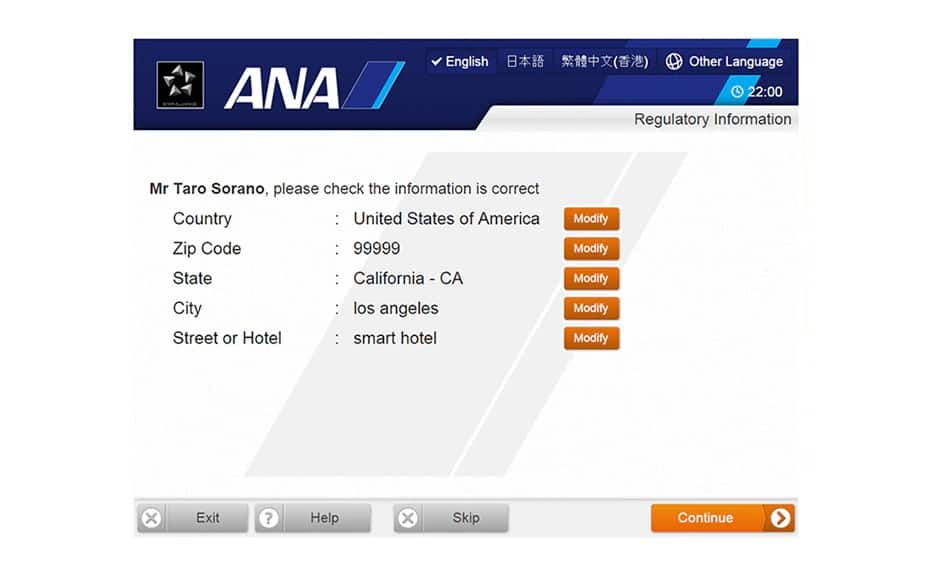
Country/Region of Residence Registration Screen (only for flights arriving in the U.S. and Canada)
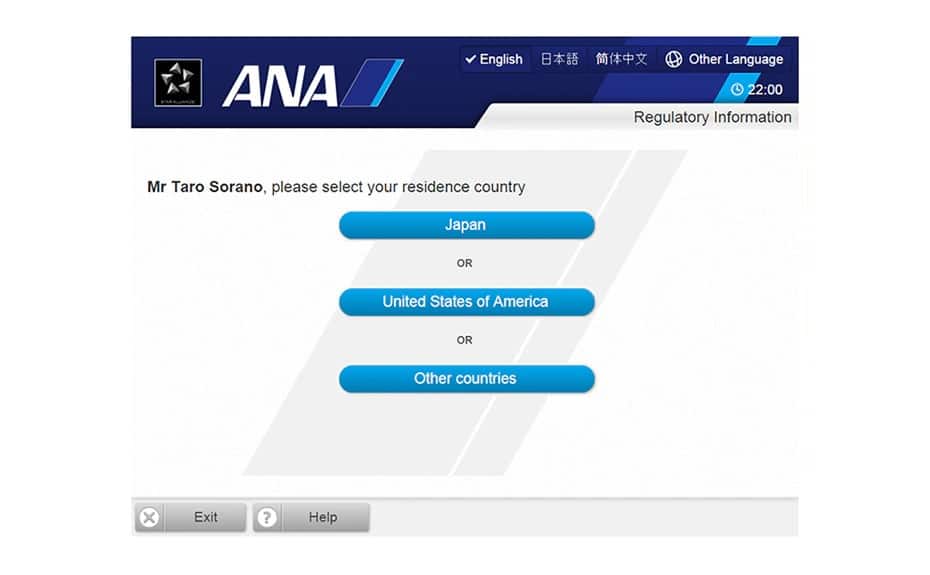
-
*
Customers who are entering the United States on a visa need to select their own country/region as the country/region of residence.
-
*
-
STEP 16
Destination Selection Screen (only for flights arriving in the United States)
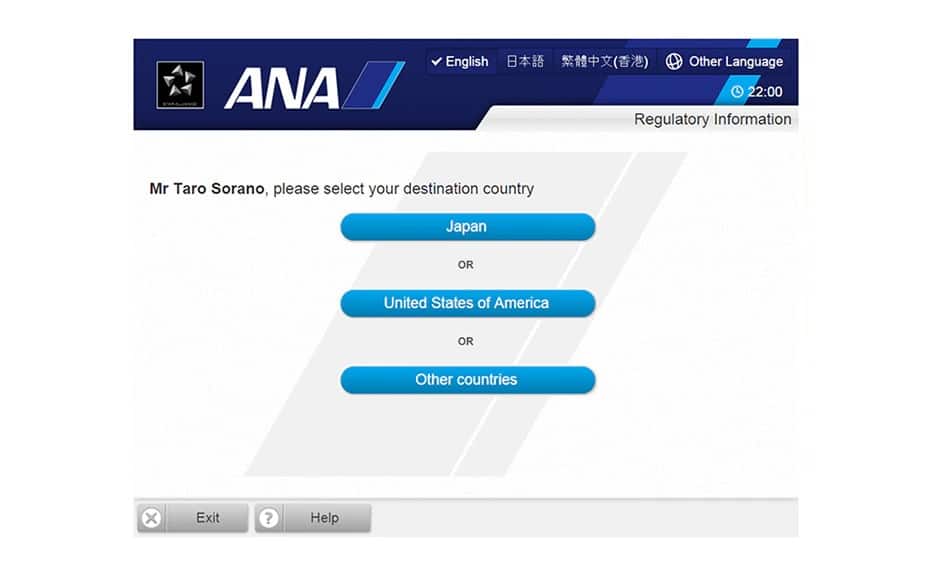
Please select the United States.
-
STEP 17
Enter Zip Code Screen (only for flights arriving in the United States)
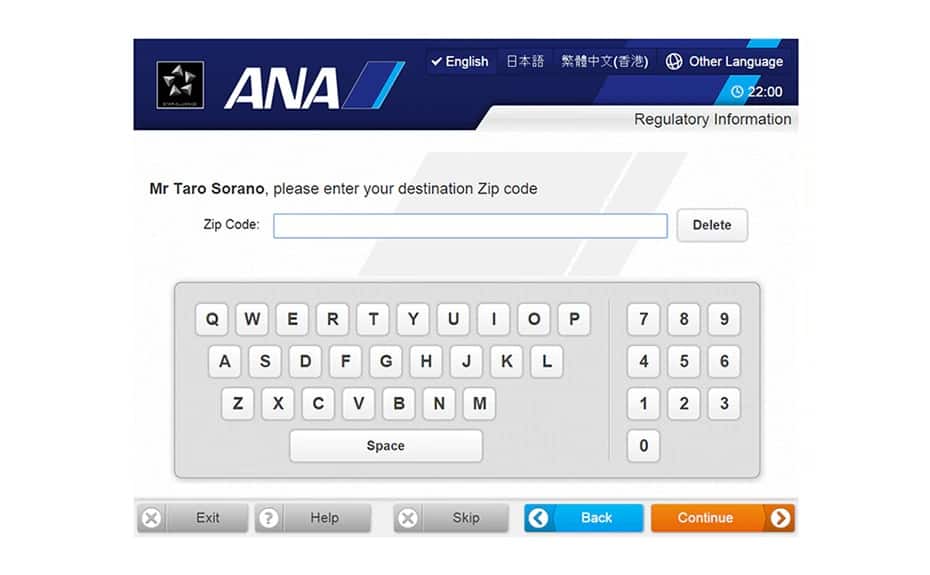
Enter the zip code of your address while in the United States.
If you are connecting to a flight to another country/region, please enter the number "99999."
-
STEP 18
Enter State Screen (only for flights arriving in the United States)
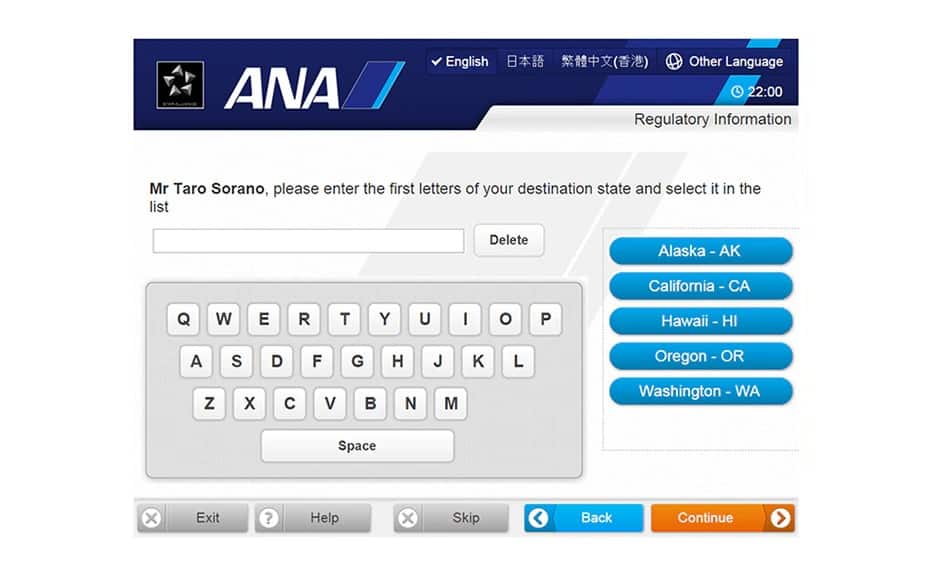
Enter the state that you will stay in while in the United States.
If you are connecting to a flight to another country/region, enter the name of the destination country/region as the state name. -
STEP 19
Enter City Screen (only for flights arriving in the United States)
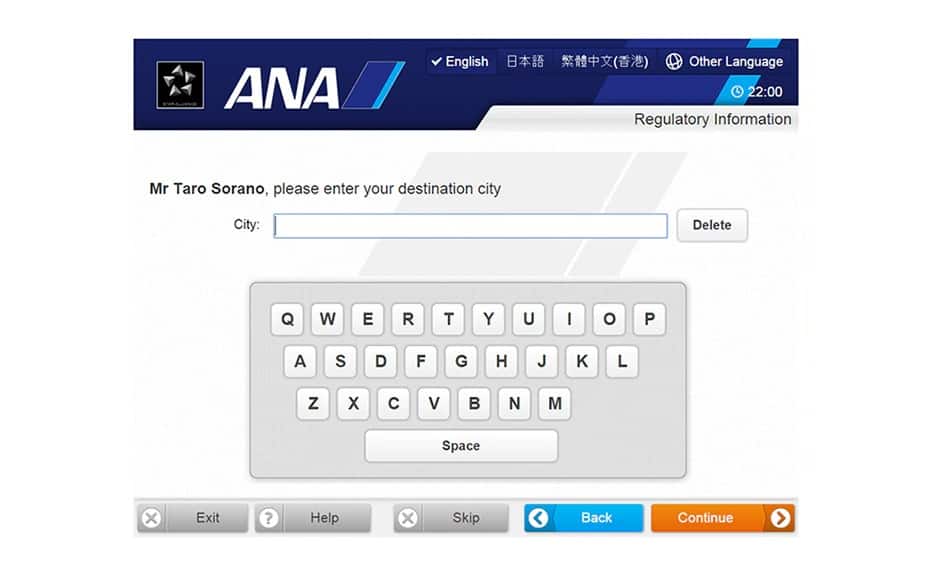
Enter the city that you will stay in while in the United States.
If you are connecting to a flight to another country/region, enter the name of the destination city as the city name. -
STEP 20
Enter Address Screen (only for flights arriving in the United States)
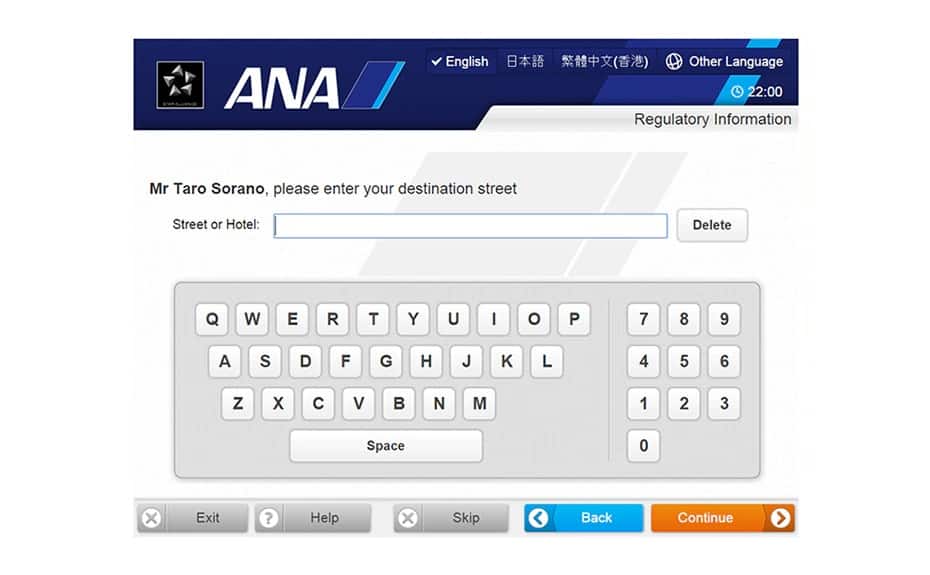
Enter your address while in the United States (street name, hotel name, etc.).
If you are connecting to a flight to another country/region, enter the word "TRANSIT." -
STEP 21
-
STEP 22
Visa Registration Screen (only for flights arriving in the United States)
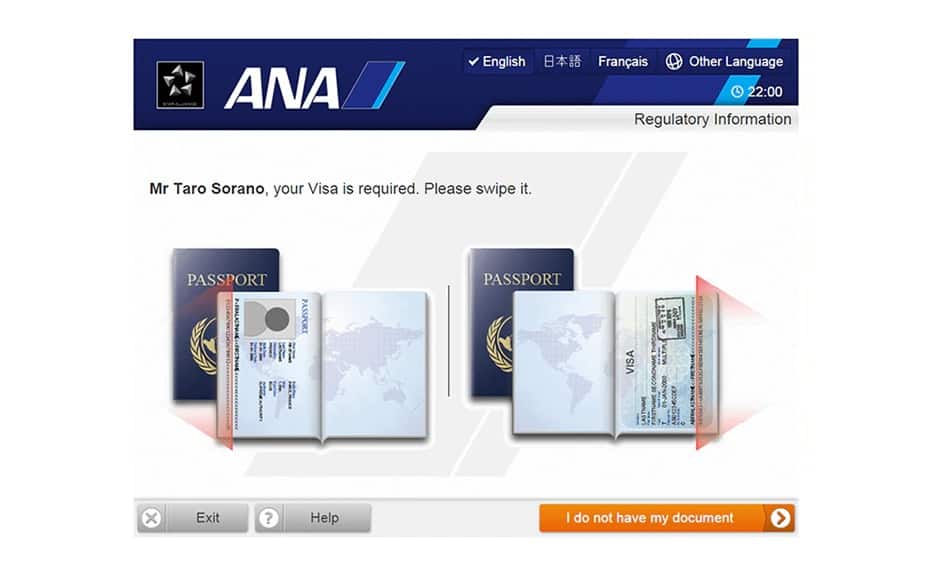
Place the barcode of the visa that you are using to enter the United States onto the reader.
After the boarding pass has been issued, Step 24 will be displayed. -
STEP 23
Register U.S. Residence Information Screen(only for flights arriving in the United States)
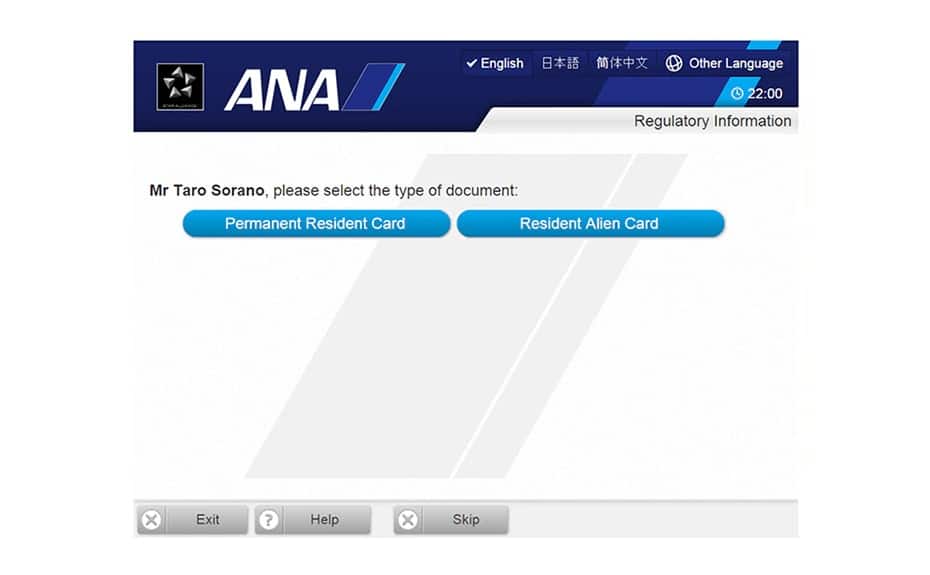
Select permanent resident card (Green Card) or resident card, then enter the relevant information.
-
STEP 24
Collect Boarding Pass Screen
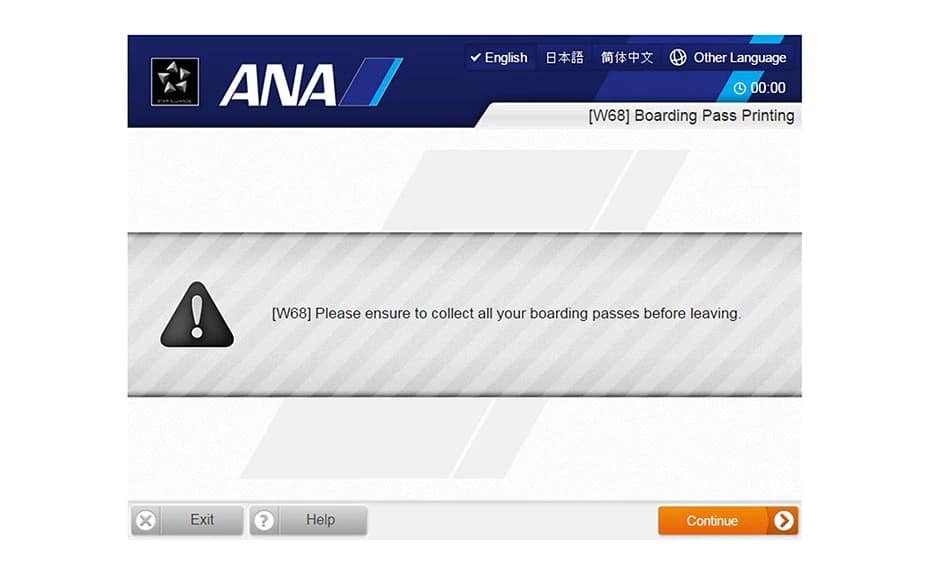
Please collect the issued boarding pass.
-
STEP 25
Check-in Complete Screen
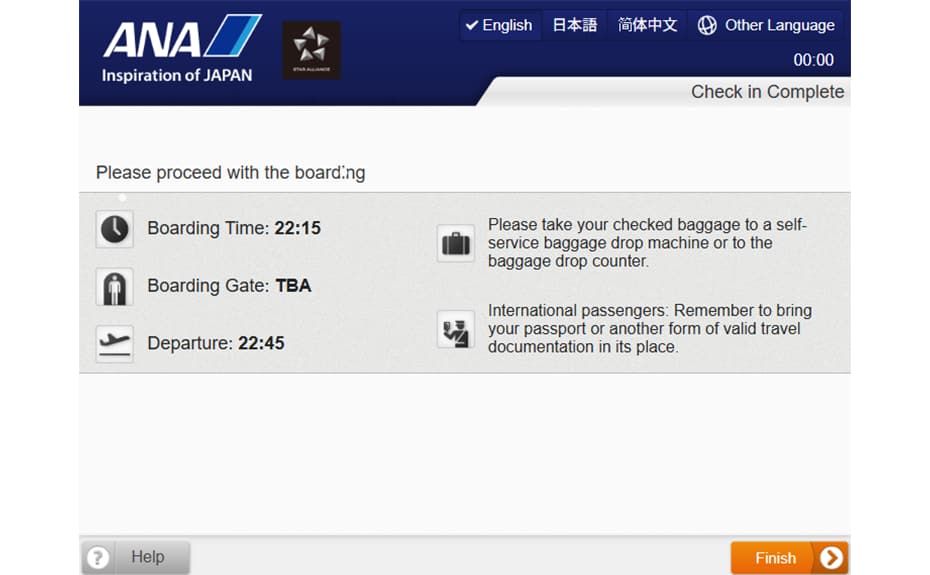
This confirms the completion of check-in procedures.





Member Login
Information for Members Logging In
- Before proceeding to log in, please be sure to read and accept the section on the purpose of using personal information in the ANA Privacy Policy.
- Points to note when using your AMC account.
Auto-Login with Cookies
- However, you will need to re-enter your password as a form of verification when making reservations, requesting awards, registering/revising personal information, and using other members-only functions.
-
The confirmation screen will reappear after closing all browser windows even if you checked "Do not show this screen again."
Entry of One-Time Password
If you have not received your one-time password
If your one-time password does not come through, please check your settings for receiving it and then re-send it.
If you do not do anything on the screen for a certain amount of time, you will have to request another one-time password.
Select your desired destination email address.
Do you really want to log out?
- If you click "Log Out," you will be logged out even if you have selected "Save Login Status."
- Close all open browser windows if you want to quit your session without logging out.
-
The confirmation screen will reappear after closing all browser windows even if you checked "Do not show this screen again."

ANA Biz is a business travel arrangement service.

-
MILES
-
ANA SKY COINS
-
Premium Point / Point on ANA /
-
Reservations
-
MILES
-
MILES
-
Login
-
Support